

How to use the Ultimate Performance Plan in Windows 10
Microsoft uses updates to release new features that will make people’s daily computing tasks more convenient. For instance, the tech company included an ‘Ultimate Performance’ power scheme with the Windows 10 April 2018 Update to optimize the system’s performance. In this article, we are going to discuss what this feature does. We will also show you how to enable the Ultimate Performance power plan in Windows 10, allowing you to enjoy its benefits.
What is the Ultimate Performance Power Plan?
What the Ultimate Performance power plan does is boost the performance of high-power systems. It is designed to reduce or eliminate micro-latencies related to fine-grained power management techniques. If you notice a slight delay between the time your OS recognizes that a piece of hardware needs more power and the time it is actually delivered, you are experiencing a micro-latency. No matter how short the delay is, it can still make a difference.
The Ultimate Performance plan is designed to get rid of hardware polling, allowing the equipment or peripheral to consume all the power it needs. Moreover, it disables any power-saving features to enhance performance. That said, if a device operates on battery power, it does not have this option by default. After all, the feature consumes more power, killing the battery much faster.
It is worth noting that the Ultimate Performance plan works best for systems with hardware that continually goes to and from an idle state. However, if you’re running a game, all the hardware likely works together to create the environment around you. As such, the only improvement you’ll see will be a slight boost on the frames per second upon initial startup. On the other hand, if you are running a 3D design program or a video editor that is occasionally putting a heavy workload on your hardware, the improvement will be evident.
Another key thing to remember is the fact that the Ultimate Performance power plan increases the amount of power that your operating system consumes. So, if you plan on enabling this feature on your laptop, you need to keep your device plugged at all times.
How to enable the Ultimate Performance Power Plan in Windows 10
- On your taskbar, click the Windows icon.
- Click the Settings button which looks like a gear icon.
- Once the Settings app is open, select System.
- Go to the left-pane menu, then click Power & Sleep from the options.
- Under the Related Settings section, click Additional Power Settings.
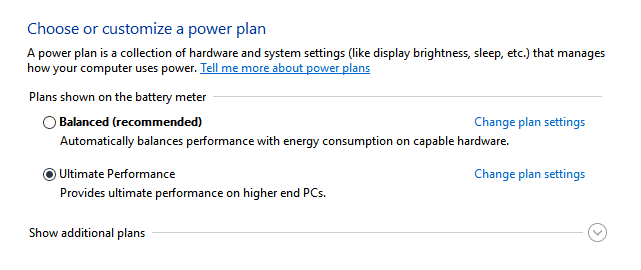
- A new window will pop up. Click Show Additional Plans, then select the Ultimate Performance option.
Note: This option may not appear under this section if you are using a laptop.
What to do when the Ultimate Performance Power Plan is not available
As we’ve mentioned, the Ultimate Performance power plan option may not be available on some systems, especially if you are using a laptop. However, you can still enable the feature via Command Prompt or PowerShell. To do this, you need to follow the instructions below:
- Right-click the Windows icon on your taskbar.
- Select Command Prompt (Admin) or Windows PowerShell (Admin) from the list.
- If prompted to give permission to the app, click Yes.
- Now, copy the command below and run it via Command Prompt or Windows PowerShell:
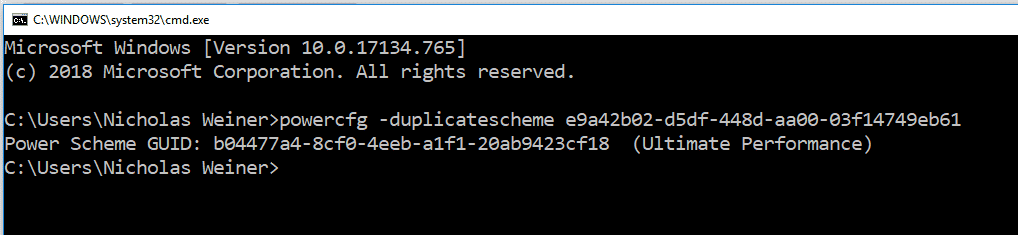
powercfg -duplicatescheme e9a42b02-d5df-448d-aa00-03f14749eb61
Once you open the Power Options window, you will be able to see the Ultimate Performance power plan option. On the other hand, if you decide to disable the feature, you can always remove it from the Settings app. However, remember to switch to a different plan before doing this. Otherwise, you might run into errors.
What do you think about the Ultimate Performance power plan? We’d love to hear your thoughts!
One Response
Cool stuff!